|
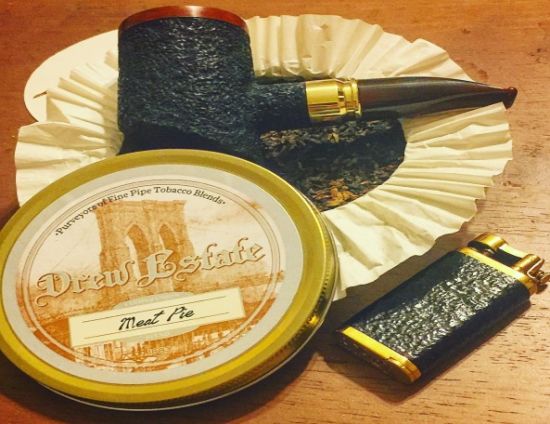
Pop Smoke with Mean Gene May 16, 2018 By Gene Norton Welcome back to Pop Smoke with Mean Gene. After a great Type I SWAT course of which I had the distinct pleasure of training some of Americas finest Hitters in Blue I am ready to bestow some more tobacco knowledge on y'all with today's edition of Pop Smoke: The Basics of Smoking a Pipe. This article will cover the process of selecting a pipe, the necessary tools you'll need, and without getting too far into the weeds we will talk about selecting tobacco.
Some years back, a good friend of mine that enjoyed cigars and Scotch introduced me to Scotch. I've always been a bourbon man but after being pestered for a year or so he wore me down on the libation front and then suggested that I try pipe smoking. I've always thought of smoking a pipe as a bit dated, but I gave it a shot. While on a trip home, I picked up some of my Pop's old pipes and accoutrements. I knew nothing at the time and like any red-blooded American man I made no attempt to research anything (the equivalent of reading an instruction manual) before I dove in head first. I grabbed some aromatic, traditional scented pipe tobacco, snatched one of the old man's pipes from the rack, packed it up, and started puffing away like a the little engine that could. Suffice to say, I found out the hard way that I was doing it wrong. A lesser man would have thrown the damn thing into a bonfire! I couldn't keep the bowl lit so I relented and looked up a video on YouTube for proper smoking techniques. Over the next hour I played with filling the bowl different ways and using different methods of smoking and tamping. What I found out was that in addition to the nuances of packing a pipe and keeping it lit, smoking cadence is an important part of enhancing your smoking experience and efficiency. Without a smooth and methodical smoking cadence you can end up with tongue bite, or in my case mouth bite! Tongue bite occurs when you puff away like a freight train and make the tobacco burn too hot. The heat of the smoke and condensation of the moist tobacco create a "steaming" effect that burns or scalds your taste buds, making your mouth feel worse than the most horrid, dry hangover breath you've ever woke up with. I'm going to attempt to keep you all from making that mistake with the guidance below.  PIPE SELECTION: As with most things in life you tend to get what you pay for. With that being said I wouldn't recommend buying a $100.00-$200.00 pipe if you're just getting into the hobby. You can find any number of great beginner pipes for a small fee and if it doesn't turn out to be your bag then you won't feel bad shit canning it after a few attempts. I once had bad luck with one of Pop's Savinelli pipes so I grabbed a $5.00 Missouri Meerschaum (MM from here on out) from the local Tobacconist and that was my trial and error pipe. I suggest buying a MM corn cob pipe or heading to Walgreens to pick up a Dr. Grabow from behind the counter. If you're going to buy a corn cob pipe PLEASE don't be a cheap ass! MM's are already cheap as dirt but the quality, legacy and customer service of this 100% American product can't really be matched. Do NOT, I repeat do NOT buy a $3.00 Chinese knockoff. Those cobs you see for $0.99-$3.00 in the basket at the local headshop will likely catch fire during your first smoke. Another hard lesson I learned was opting to buy a moderate to expensively priced factory pipe. I had only been in the pipe smoking game for a few months and had gotten the hang of it well enough that I decided I must have a pricey piece to show off. I spent about $130.00 on a Peterson Donegal Rocky XL bent billiard. After I got it I immediately started seeing tons of American based artisans that commissioned custom pipes. Moral of the story is: Patience. Don't be overzealous and upgrade your collection until you have checked out the options of having a custom pipe carved specifically for you at the same cost. More to the point, there are 3 main materials that are used to make pipes: briar, corn cob, and meerschaum. You should consider this when buying a pipe. Briar (which is actually a tree burl) is the most common material that you will come across. As a beginner, I would suggest sticking with that for your first purchase. If you decide to go the corn cob route, stick with MM. Another somewhat iconic material is Meerschaum, which is a delicate, porous white stone that forms from compacted sediment in the seabed's of Turkey and Africa. You often see Meerschaum pipes that have been carved with very ornate designs like a woman on the front of a ship, or a lion's head. Meerschaum requires different maintenance and is pretty fragile so if dropped it will break. The best place to start is at the drugstore or local Tobacconist. I'd recommend sticking to the two name brands I mentioned above (MM and Dr. Grabow). I will list some other options at the end of the article. TOBACCO SELECTION: I highly suggest you go to a reputable Tobacconist for guidance in this area. Pipe tobacco is generally blended from several different types of tobacco leaves. Each tobacco type has different notes or flavors. Aromatic tobacco blends contain food grade "toppings" that are added to impart and change the flavor of the blend. I will include a link that describes some of the basic flavor profiles of some of the most prominent leaves and blends. There is generally a flavor profile to accommodate most smokers. *NOTE some tobacco blends will "ghost" a pipe which means that after general cleaning the pipe will temporarily carry the flavor of a previously smoked tobacco. Keep that $5.00 cob around to test tobacco blends before committing to pack them in a higher dollar pipe! ACCESSORIES: There are a few things that you absolutely need and a few things that can enhance your smoking experience. Let's start with the 3 necessities. A good pipe tool, pipe cleaners, and FIRE! At a minimum you need something flat to tamp the tobacco into the bowl and, something to clean the pipe when you're finished smoking. Czech or "3-in-1" pipe tools are the most recognized and widely used tools. They can be found for a few bucks at most smoke shops or online. If you're in the market for a tamper/tool then I suggest buying 2-3 Czech tools as they have a tendency to hang out with all those socks that disappear after every load of laundry. In a pinch, a golf tee also works nicely. If you happen to be a golfer you can get by for a good while by raiding your club bag when needed. Once you have a tool/tamper you will need cotton pipe cleaners. Pipe cleaners are only about a dollar a sleeve so be sure to get a few. As for lighting your tobacco, the key is using a soft flame like that of a Bic or a quality wood match. Zippo also makes pipe inserts for their lighters and rumor has it you can ask them to send you one for your favorite lighter free of charge (haven't tried this but the insert wouldn't be much even if you bought it). As for nonessential accessories to make your experience more enjoyable; Consider mason style jars of different sizes for tobacco storage, a mat or shallow bowl for catching tobacco when filling your pipe, or a pouch to carry your pipe. PACKING METHODS: This is the meat and potatoes of pipe smoking right here. As previously mentioned, if you don't have this down pat you won't have a good smoking experience. There are a few different methods and many tutorial videos out there so I will briefly break down the top three.
LIGHTING AND SMOKING: Are you still with me? Good, because now we are getting down to brass tacks. With your properly filled bowl you will use at least two separate lights. The first is often referred to as the "charring light". Using that soft flame we talked about pass the flame just slightly above the tobacco and draw or pull lightly through the mouth piece using short, smooth pulls. Once the top layer of tobacco has been evenly charred, begin to draw a bit more while VERY gently tamping the tobacco. You're trying to get all the top layer of tobacco to char so you have an even ember. If this doesn't work, pass the flame around and slightly above the tobacco until the bowl is burning evenly. Repeat as necessary until the bowl is staying lit well on its own as you gently puff and find your cadence. Briar and quality corn cob pipes hold up to heat well depending on the thickness of the bowl. If you are noticing the bowl getting too hot place it down and let sit for a while to cool. It may go out and you'll have to light again. There! Now you have been armed with the knowledge necessary to begin smoking a tobacco pipe. A bonus to smoking pipes as opposed to cigars is that certain ladies don't mind the smell of pipe smoke (depending on the blend you're using). My wife, for instance, doesn't mind me smoking my pipe in the house and lets me know how she feels about the room note each time. If she likes it then I'm in the clear. If she doesn't then that blend is reserved for outdoors or the cigar shop. Keep it smoky, my friends! Here are links, for some of the terminology products mentioned in this article: Frank Method, Three Pinch, Typical Tobacco Blends, Pipe Tool, Morgan Bones (quality briar on a budget), and Missouri Meerschaum Keep an eye out for more of my smoke related articles and Follow Mean Gene, on Instagram |
